Soccer Tactics 4 - Kick the Ball.
Before we can kick the ball, we need to know that it is near our Soccer Robot's kicking mechanism.
There are lots of ways we can use to check if the ball is close enough. We could use a touch sensor, a light sensor, an ultrasonic (sonar) sensor, or one of several other types of non-LEGO sensors. It is up to you to decide which type of sensor you will use.
In my case, I decided to choose an ultrasonic sensor. Your preferred sensor may be different - that is OK!
Finding when the Soccer Ball is near the Kicker.
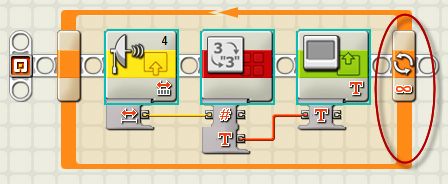
First I need a program to shows me the ultrasonic sensor reading when a ball approaches my soccer robot. To start, add code for an ultrasonic (sonar) sensor, as shown below.
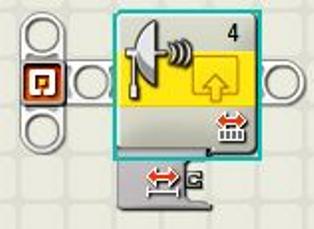
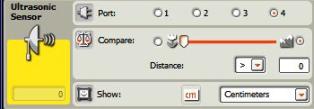
The ultrasonic sensor is plugged in to slot 4 of my soccer robot's computer brick. If your sensor is plugged in to a different port, you will need to change this port setting.
The students I assist measure length in centimetres; you can change the "centimetres" setting to "inches" if this is the type of measurement you use.
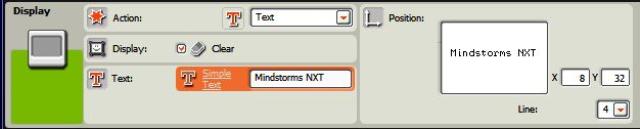
This sensor will provide the distance between the ball and the sensor as a number. To be able to display this number on the screen of our NXT robot, we need to convert this "number" to "text".
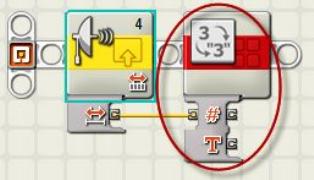

Next we need to display the text on the NXT computer brick's screen.
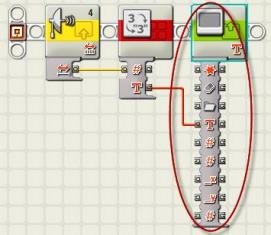
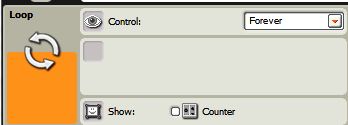
The code above will only give one reading. To allow us to see how the reading changes as the soccer ball approaches the ultrasonic sensor, we need a loop.
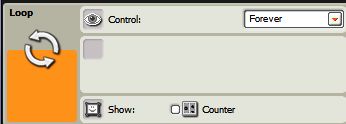
When we download this program into our soccer Robot, and run it, we will be able to see how the ultrasonic reading changes as the soccer ball approaches our robot. This will enable us to choose the ultrasonic reading that we can use to tell our soccer robot that the ball is close enough to kick.
Note that in the case above, I used an ultrasonic sensor. This may not be the best way to tell your robot when the ball is in the right place to kick. Feel free to use other types of sensors if this is better for your robot. If you use another type of sensor, use a process similar to the process above to enable you to choose a good setting for your soccer robot kicking sensor.
Telling Your Soccer Robot when to Kick the Ball.
There are lots of different ways to get your Soccer Robot to kick the ball. Which one is best for your Robot is something you can decide. As an example, I chose to use a bar attached to a third motor that rotates in roughly a quarter turn to kick the ball - your robot ball kicker may be different. Do not be afraid to go your own way! In the meanwhile, my code for my first attempt at a kicker may be a help when you are thinking about how your Robot could kick a ball...
First I had to use the LEGO Ultrasonic Sensor to tell my Robot when the ball was close enough to kick.
Note that my LEGO ultrasonic (sonar) sensor is plugged into computer brick socket 4. If your robot has an ultrasonic sensor plugged in to a different socket, you will have to change this code.

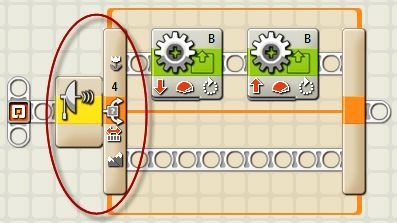
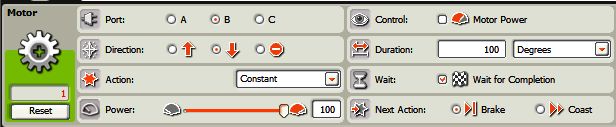
The ultrasonic sensor on my Robot "sees" a distance of 13 centimetres when the ball is not near. It "sees" a distance of 8 centimetres when the ball is completely under the sensor. In the ultrasonic control panel above, I have chosen to tell my robot to kick if the distance is less then 10 centimetres (your distance will be different).
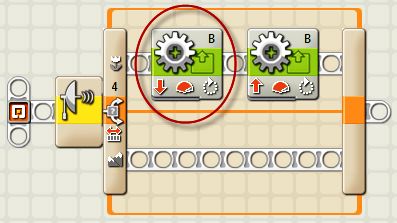
My Soccer Robot has a kicker attached to motor B. A rotation "backwards" of approximately 100 degrees (about a quarter turn) will cause the "kicker" attached to motor B's axle to kick the ball.
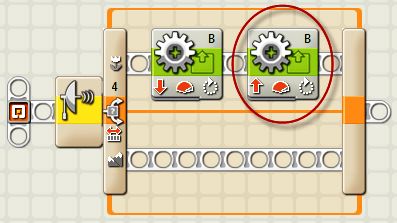

Next we return the kicker to its usual "resting" position by telling the motor B to go "forwards" 100 degrees. This will mean that the kicker is ready to give the ball another kick.
Testing the ball-kicking code
To test this code we will enclose the code in a loop, so that the ultrasonic sensor is continually looking for our robot soccer ball.
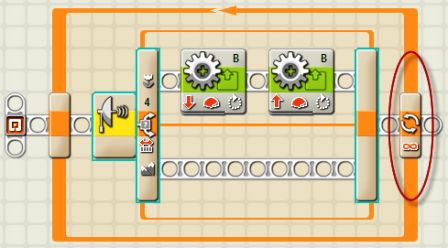
When this code is downloaded to my Robot Soccer player and run, my robot just sits there apparently doing nothing. However when I roll a ball up to the front of the robot, motor B springs into life and kicks the ball - just what I wanted.
Does your Robot Soccer kicker work nicely?
If the kicker of your Robot Soccer player misbehaves, carefully work through the code above, as it is likely that you have slipped up somewhere in your own code.
When everything is good, go on to the next step to find the full Robot Soccer GEN II rules.
DrGraeme.net - Family Fun With Robotics - LEGO NXT MindStorms - NXT-G - Robot Gen II Soccer step 7