RoboCupJunior 2004 RESCUE Building Plans
Last updated: Wed 31 Dec 2003 (Sklar and Green)
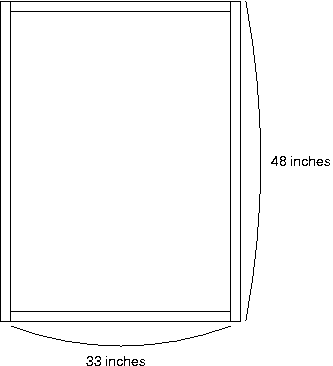
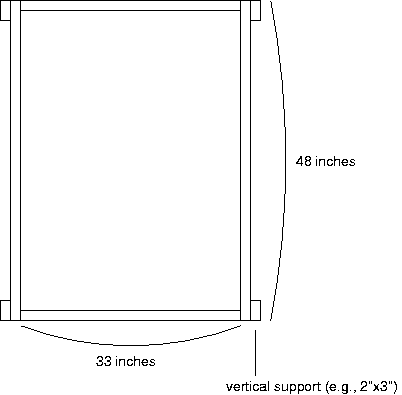
Below are the building plans for a single module.
-
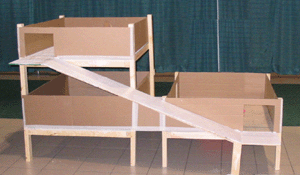
Construct a frame out of sturdy wood such as 2x4s, 2x3s or 2x2s.
Cut two pieces 48 inches long and two pieces 33 inches long.
Attach them together to create a frame, as follows:
-
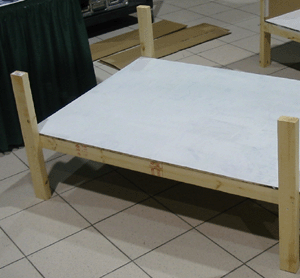
Lay a piece of 4 foot by 3 foot plywood or fibreboard (1/4"
thickness is adequate) on top of the frame and attach it
securely.
-
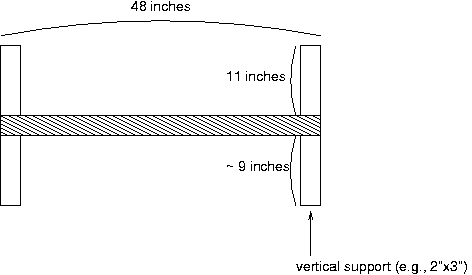
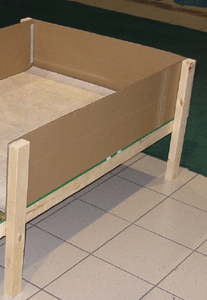
Cut four 2 foot long pieces of the 2x4s (or 2x3s or 2x2s) to act
as vertical supports (like legs).
-
|
Attach the vertical supports to the
outside of the frame at each corner so that each vertical
piece extends 11 inches above the floor of the module. It is
recommended that you drill holes through the vertical
support and attach them to the frame using bolts, so that it
is easy to take the module apart to transport it.
|
|
-
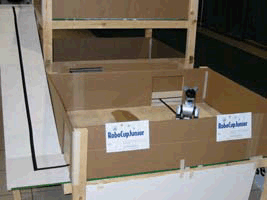
Cut 4 walls out of fibreboard, cardboard or foamcore, two of
each size as shown below:
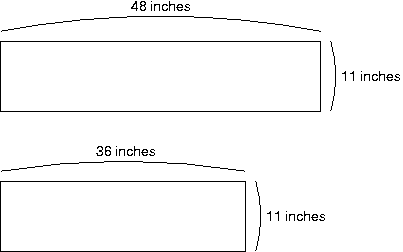
-
Cut a doorway in ONE wall of each size, as shown below:

-
Attach the walls to the vertical supports, as shown below:
Note that you can turn the pieces with the doorways to face either way (i.e., the doorway can be on the left or the right). This is illustrated in the last image on this page, where the lower level has its doorway on the right but the upper level has its doorway on the left. -
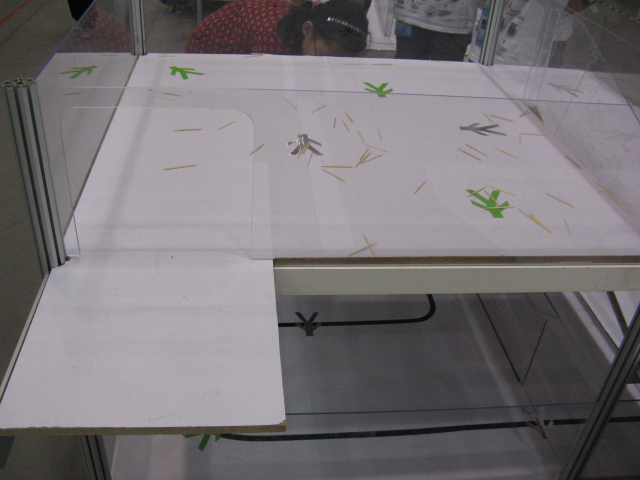
Paint the floor of the module white or cover it with white
material such as linoleum or Fablon.
-
Using black electrical tape, make a line-following course along
the floor of the room. Begin the course in the middle of one of
the doorways and end in the middle of the other doorway.
-
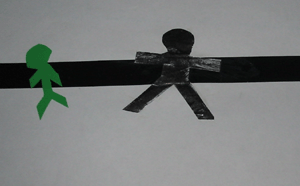
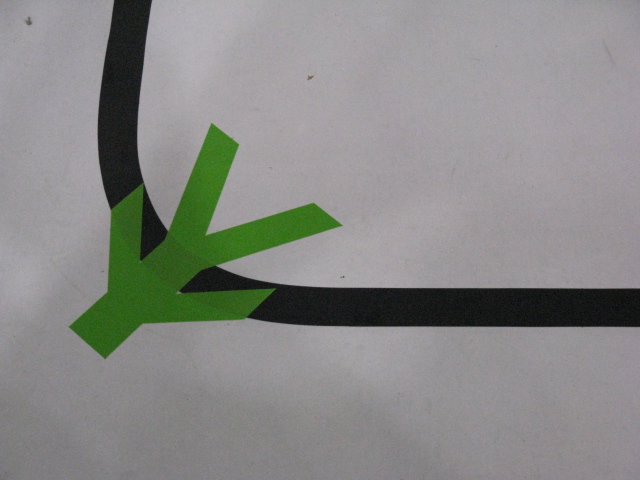
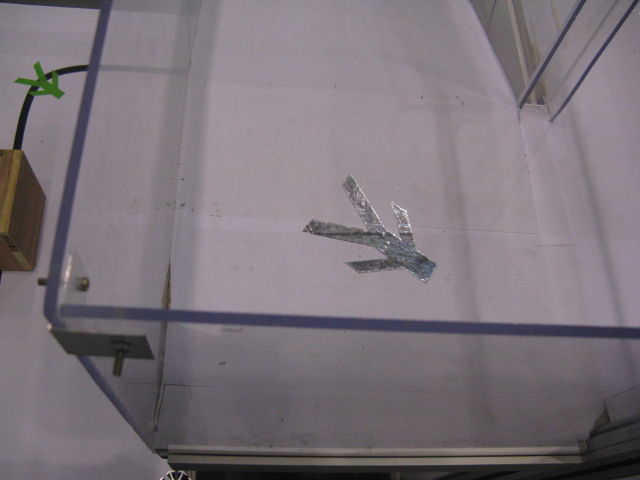
Make "victims" out of green tape, aluminized tape or aluminum
foil and place them across the black line.
You can make multiple modules and connect them via hallways or
ramps. The hallways and ramps are at least 12 inches (approximately
30 cm) wide. Note that a ramp begins and ends on square platforms,
level with the room it is going into/out of. The pitch of a ramp
will be no steeper than 22 degrees. The example below travels a
60-inch distance horizontally over a 24-inch height. The angled
section of the ramp is approximately 65 inches long.
(Unlike the sample above, continue the wall along the ramp so that
the robot won't fall off!)
http://rcj.open.ac.uk/html/Resources/rescue-plans.html
Accessed 7Dec2008-12-07
Additional notes:
1) The rules comment that the lines can be 1-2 cms wide; this could be interpreted that the line width could vary from one part of the arena to another. In Suzhou, the line width was constant, a few millimetres wider than the width of standard electrical tape in Tasmania.
2) The images of the "people" to be found was not specified very exactly with regard to their form or size. This caused us considerable problems. For future information, images of the "people" used in Suzhou are as follows:
Green man - click here.
Silver man - click here.
Top floor men & debris arrangement - click here.
Silver man on slope - click here.
3) We could not find out if large blocks of debris were to be included in the course. Since in Tasmania they are only used in Premier Rescue, we assumed they would not be used - we were wrong; they were used. You can see the ones used in Suzhou in the video below, (however note that the form of these major pieces of debris are changed each year of competition).
To see a video of one of the Rescue Course arrangements (note that they varied during the course of the competition), (broadband click here), (dialup click here)
www.DrGraeme.net - World RoboCup in Suzhou China International Rescue Rules.